Onboarding
Onboarding is the short, guided setup you go through the first time you use kweno.app. It walks you from your very first sign-in to the point where your account is configured well enough to issue invoices. This page explains how to sign in, what the setup wizard covers, and what to do next once you are set up.
Sign in
Everything starts at the sign-in screen.
- Open the app in your browser. You land on the Sign in to your account screen.
- In the E-mail address field, type the e-mail address for your account.
- In the Password field, type your password.
- Click Login.
If you have forgotten your password, use the Forgot password? link on the sign-in screen to request a reset link by e-mail. You can also change your language at any time from the Change language menu (Polish or English).
The setup wizard
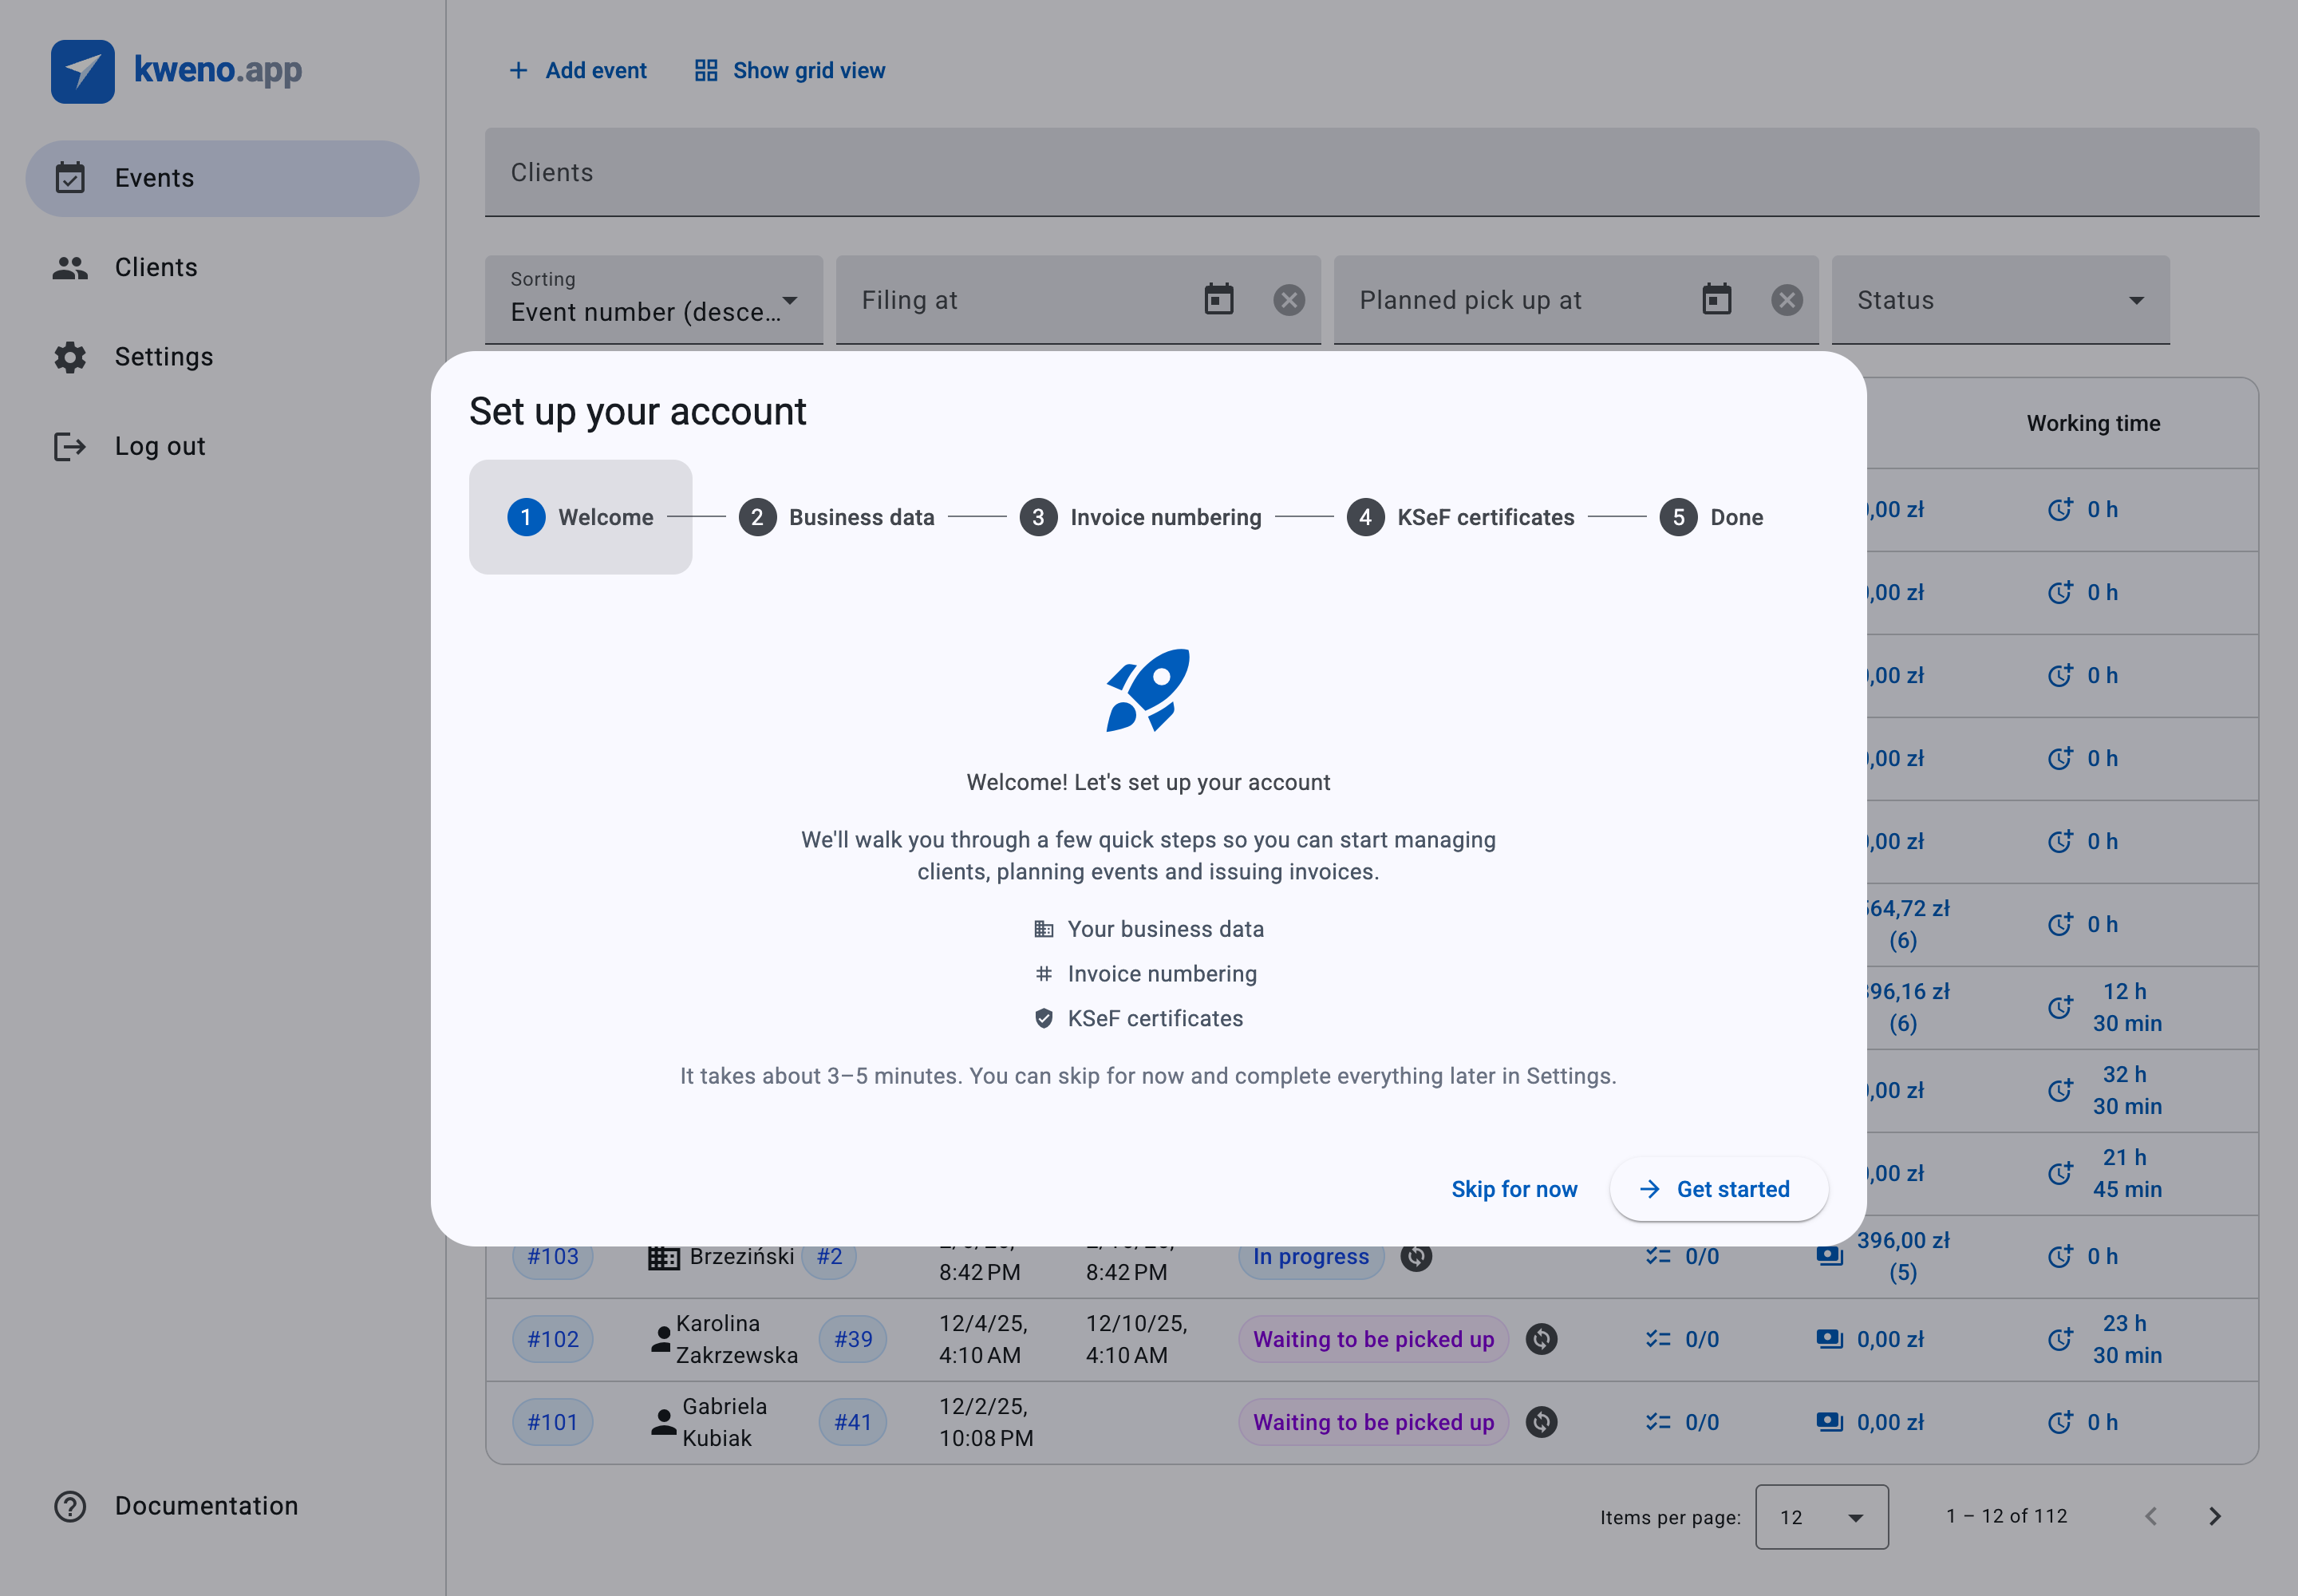
The first time you enter the app after signing in, the setup wizard opens automatically in a dialog titled Set up your account. It reappears every time you open the app until you either complete it or skip it.
The wizard has 5 steps, always shown in this order:
| Step | What it is for |
|---|---|
| Welcome | A short overview of what you are about to set up. |
| Business data | Your company and address details, used on invoices. |
| Invoice numbering | The prefixes and numbering format for your invoices. |
| KSeF certificates | Your online and offline KSeF certificates. |
| Done | Confirmation that your account is ready. |
The whole wizard takes about 3–5 minutes, and it is fully optional — you are never forced to finish it.
Info
The wizard is a linear stepper: you move through the steps in order using the buttons at the bottom of each step. You cannot jump ahead past a step you have not completed, but you can go Back to a previous step to review or change what you entered.
Welcome
The first step introduces the setup.
- Heading: Welcome! Let's set up your account
- It lists what you will configure: Your business data, Invoice numbering, and KSeF certificates.
- A note reads: It takes about 3–5 minutes. You can skip for now and complete everything later in Settings.
Two buttons are available here:
- Get started — moves on to the Business data step.
- Skip for now — closes the wizard immediately and marks your account as set up, without saving anything. See Skip and finish later below.
Business data
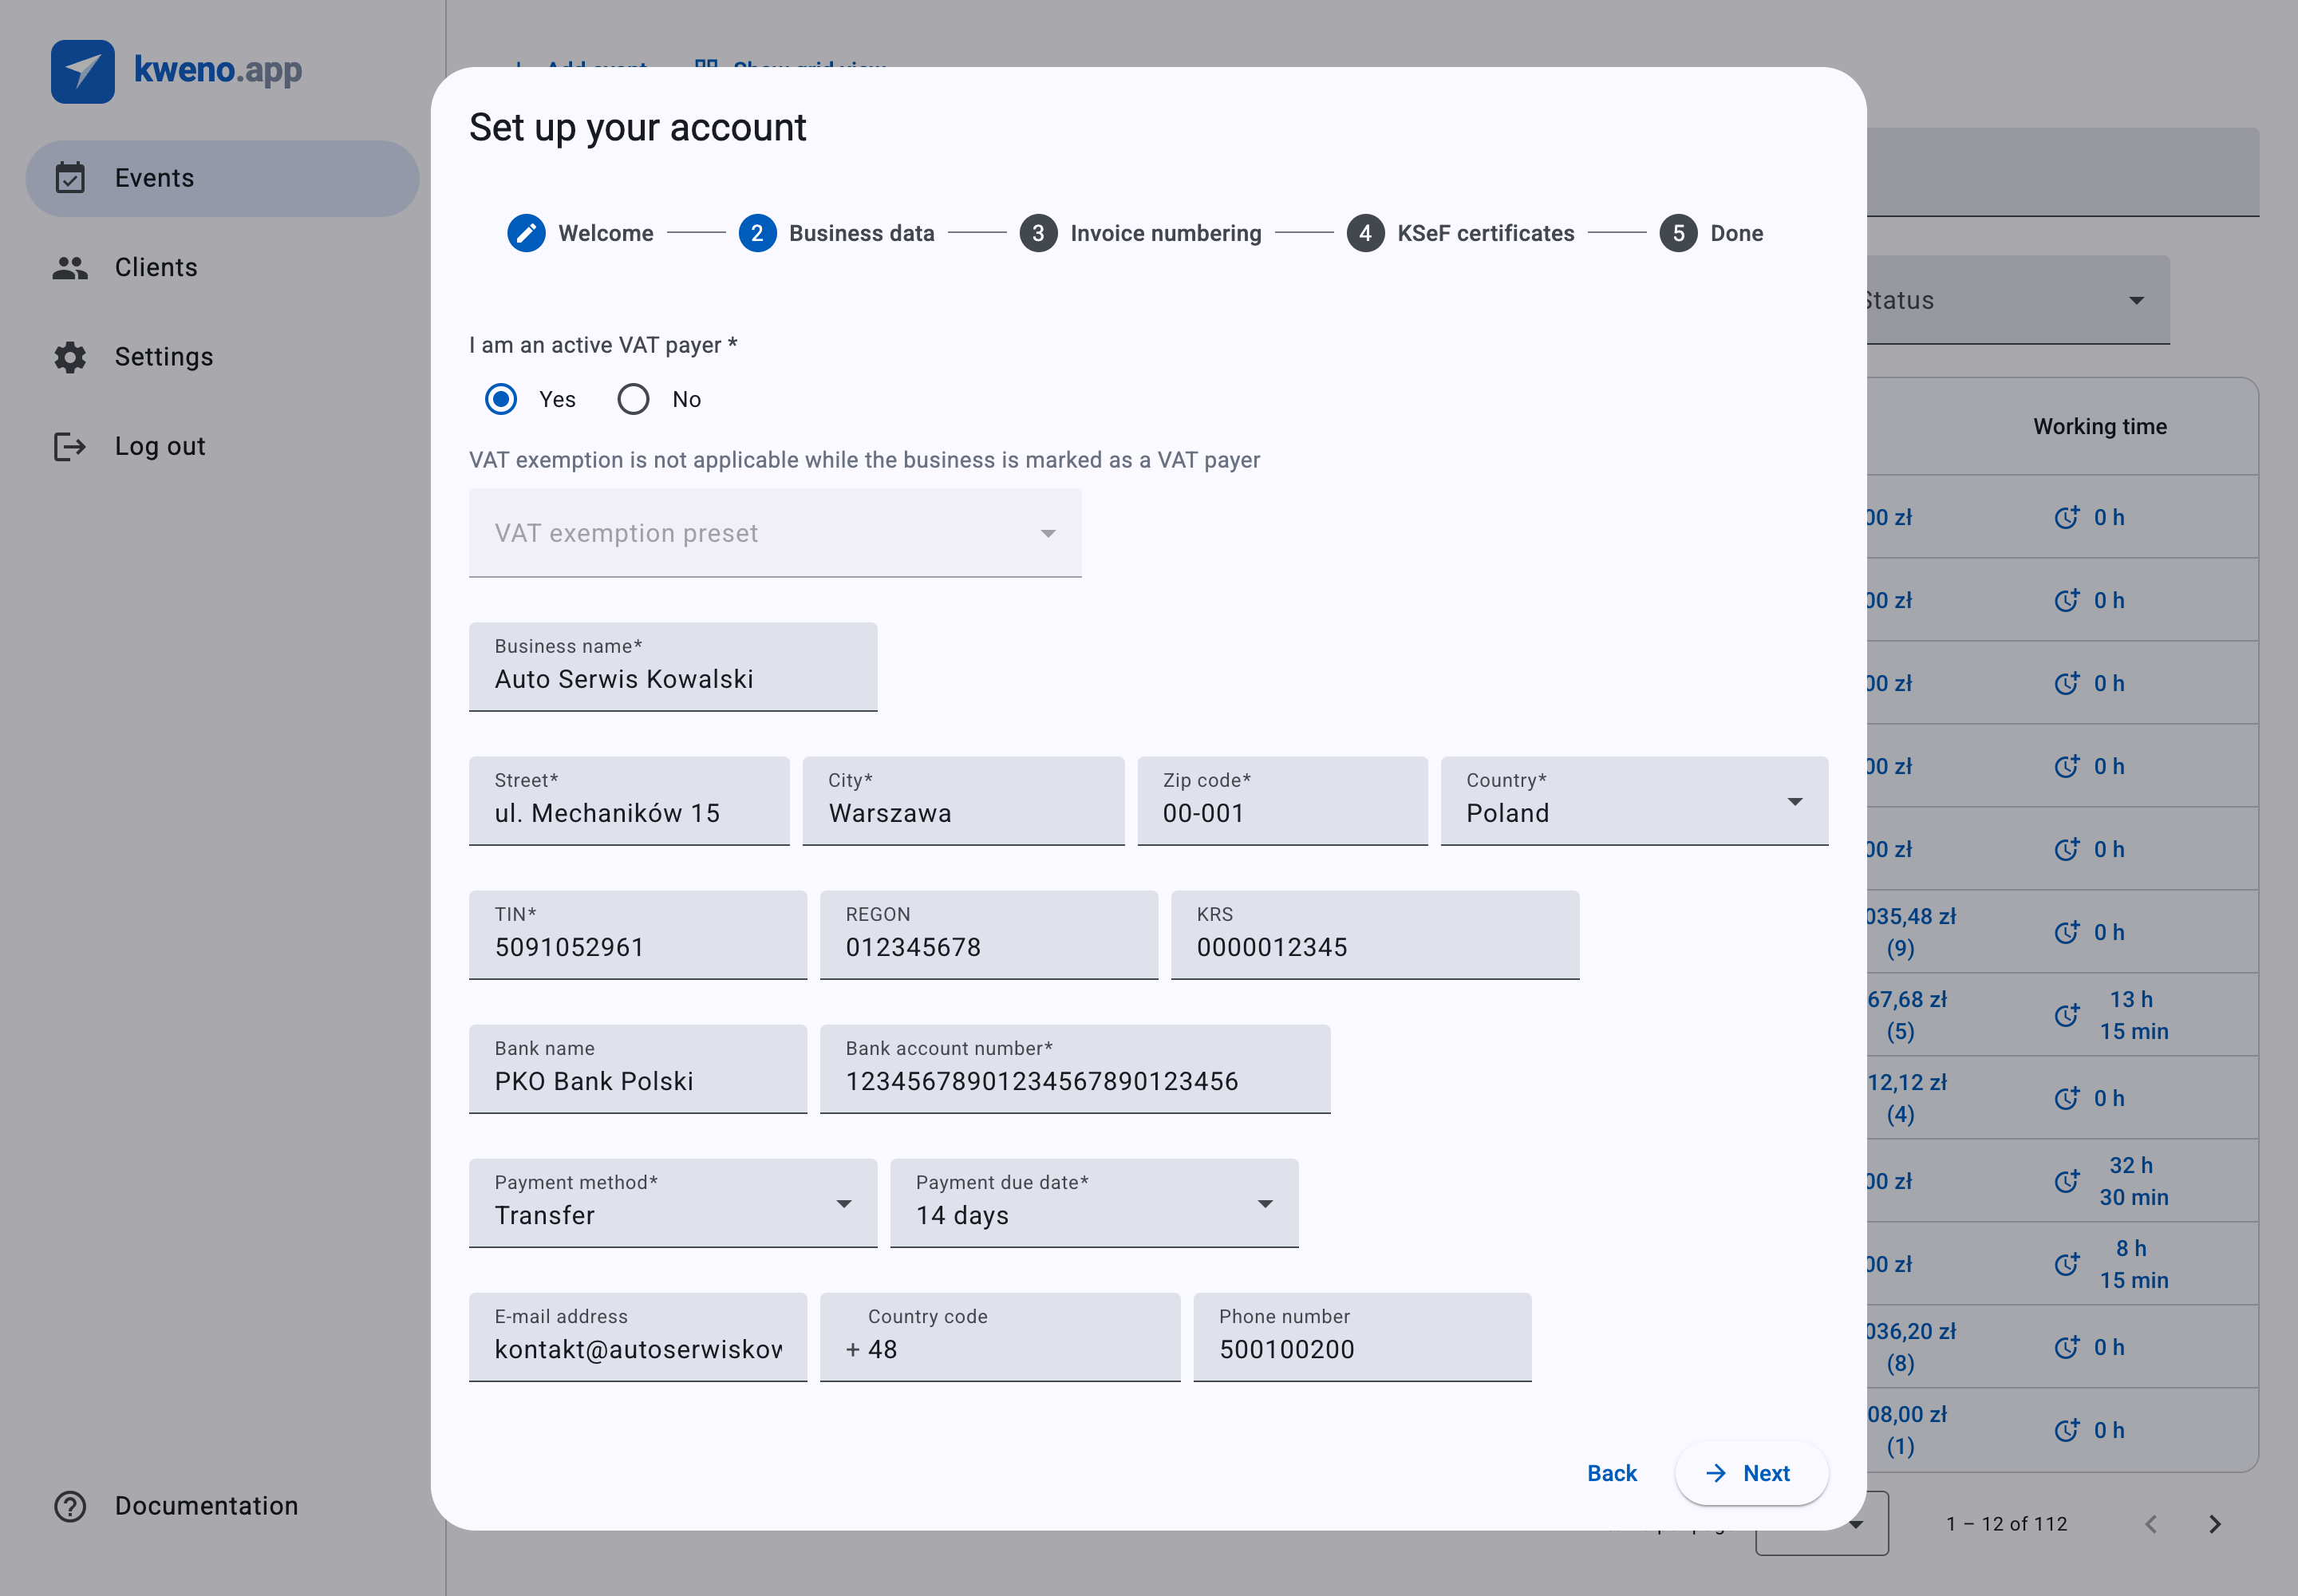
This step collects your company details — business name, address, TIN, bank account, default payment method, and more. These details identify you as the seller on every invoice you issue.
The form opens with a required choice — I am an active VAT payer (Yes/No) — that shapes how VAT is handled across the whole app. As a VAT payer you default to the standard 23% rate and charge VAT on invoices; as a non-VAT-payer you must also pick a VAT exemption preset (the legal basis for your exemption), and your default VAT rate for costs and working time becomes Exempt. See VAT status for the full effect.
Fill in the form and click Next to save your business data and continue. Next stays disabled until every required field is valid; Back returns you to Welcome.
For a full description of each field and its format, see Business data.
Warning
Business data is a prerequisite for creating invoices. If you skip it now, you must add it later before you can issue an invoice.
Invoice numbering
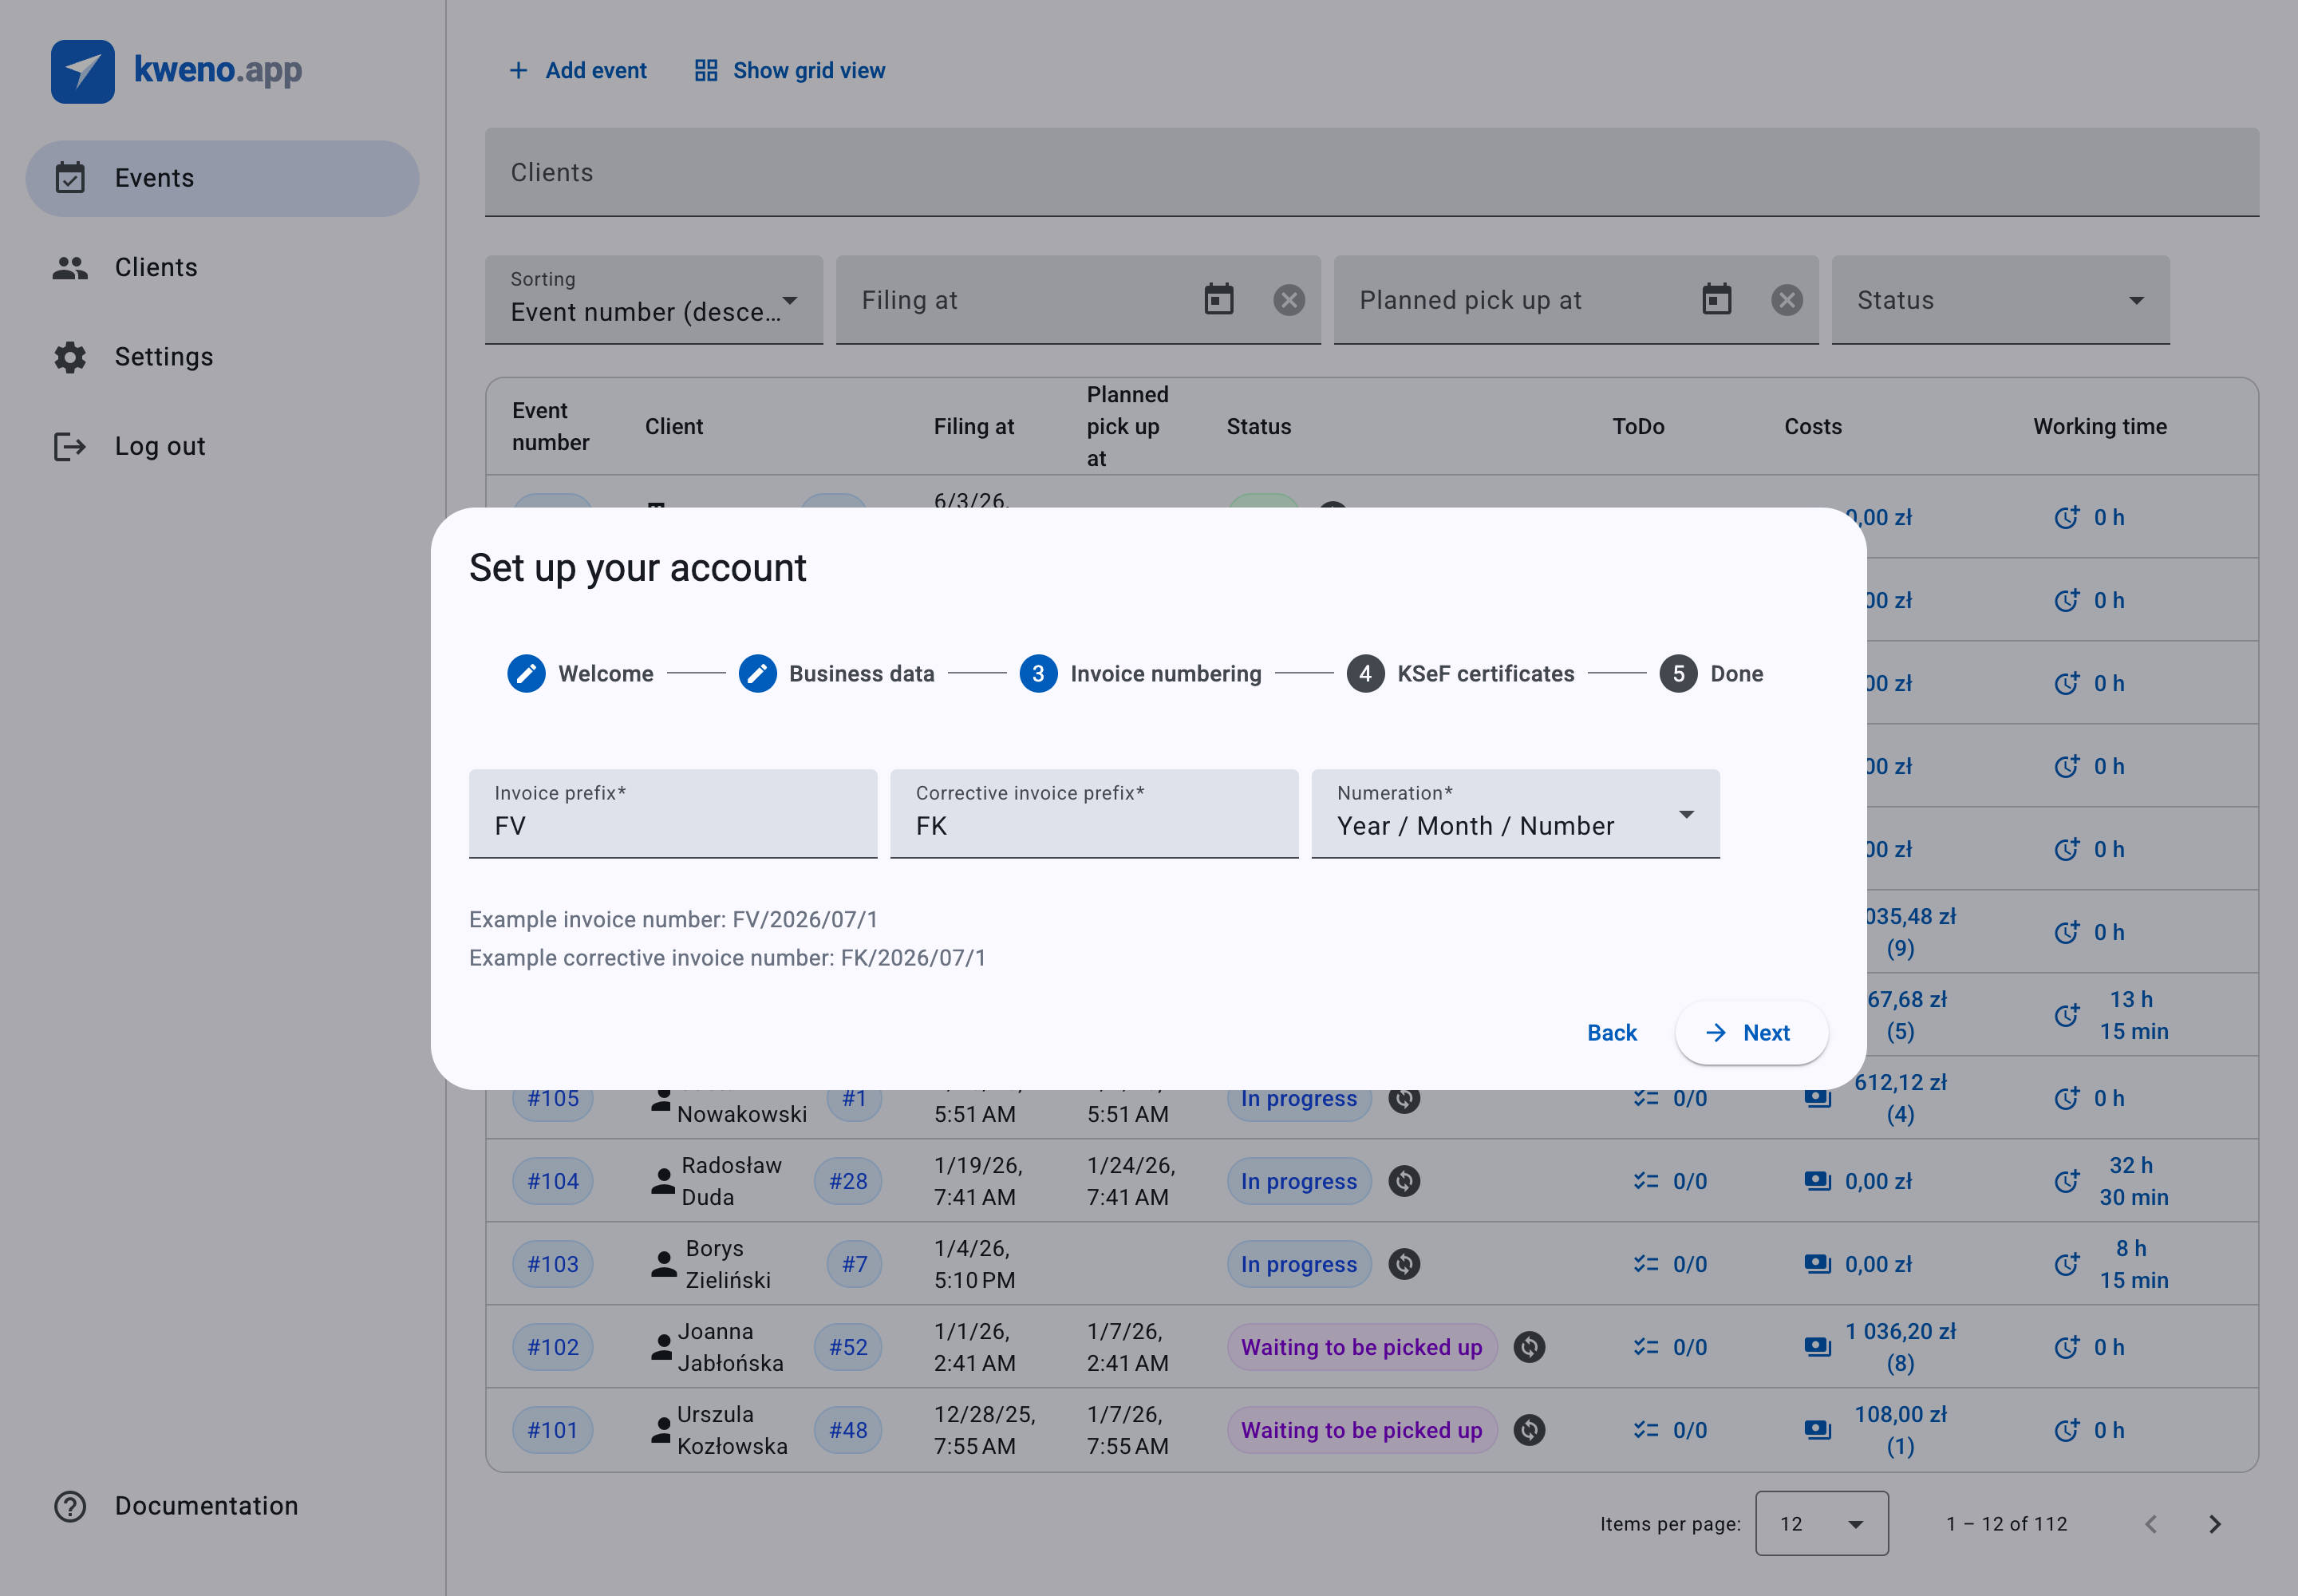
This step sets how your invoice numbers look — the Invoice prefix, the Corrective invoice prefix, and the Numeration format. The form is pre-filled from your current settings, and a live preview shows an example number as you choose a format.
Adjust the values as needed and click Next to save them and continue. Next stays disabled until the form is valid; Back returns to the Business data step.
For details on prefixes, numbering formats, and worked examples, see Invoicing.
KSeF certificates
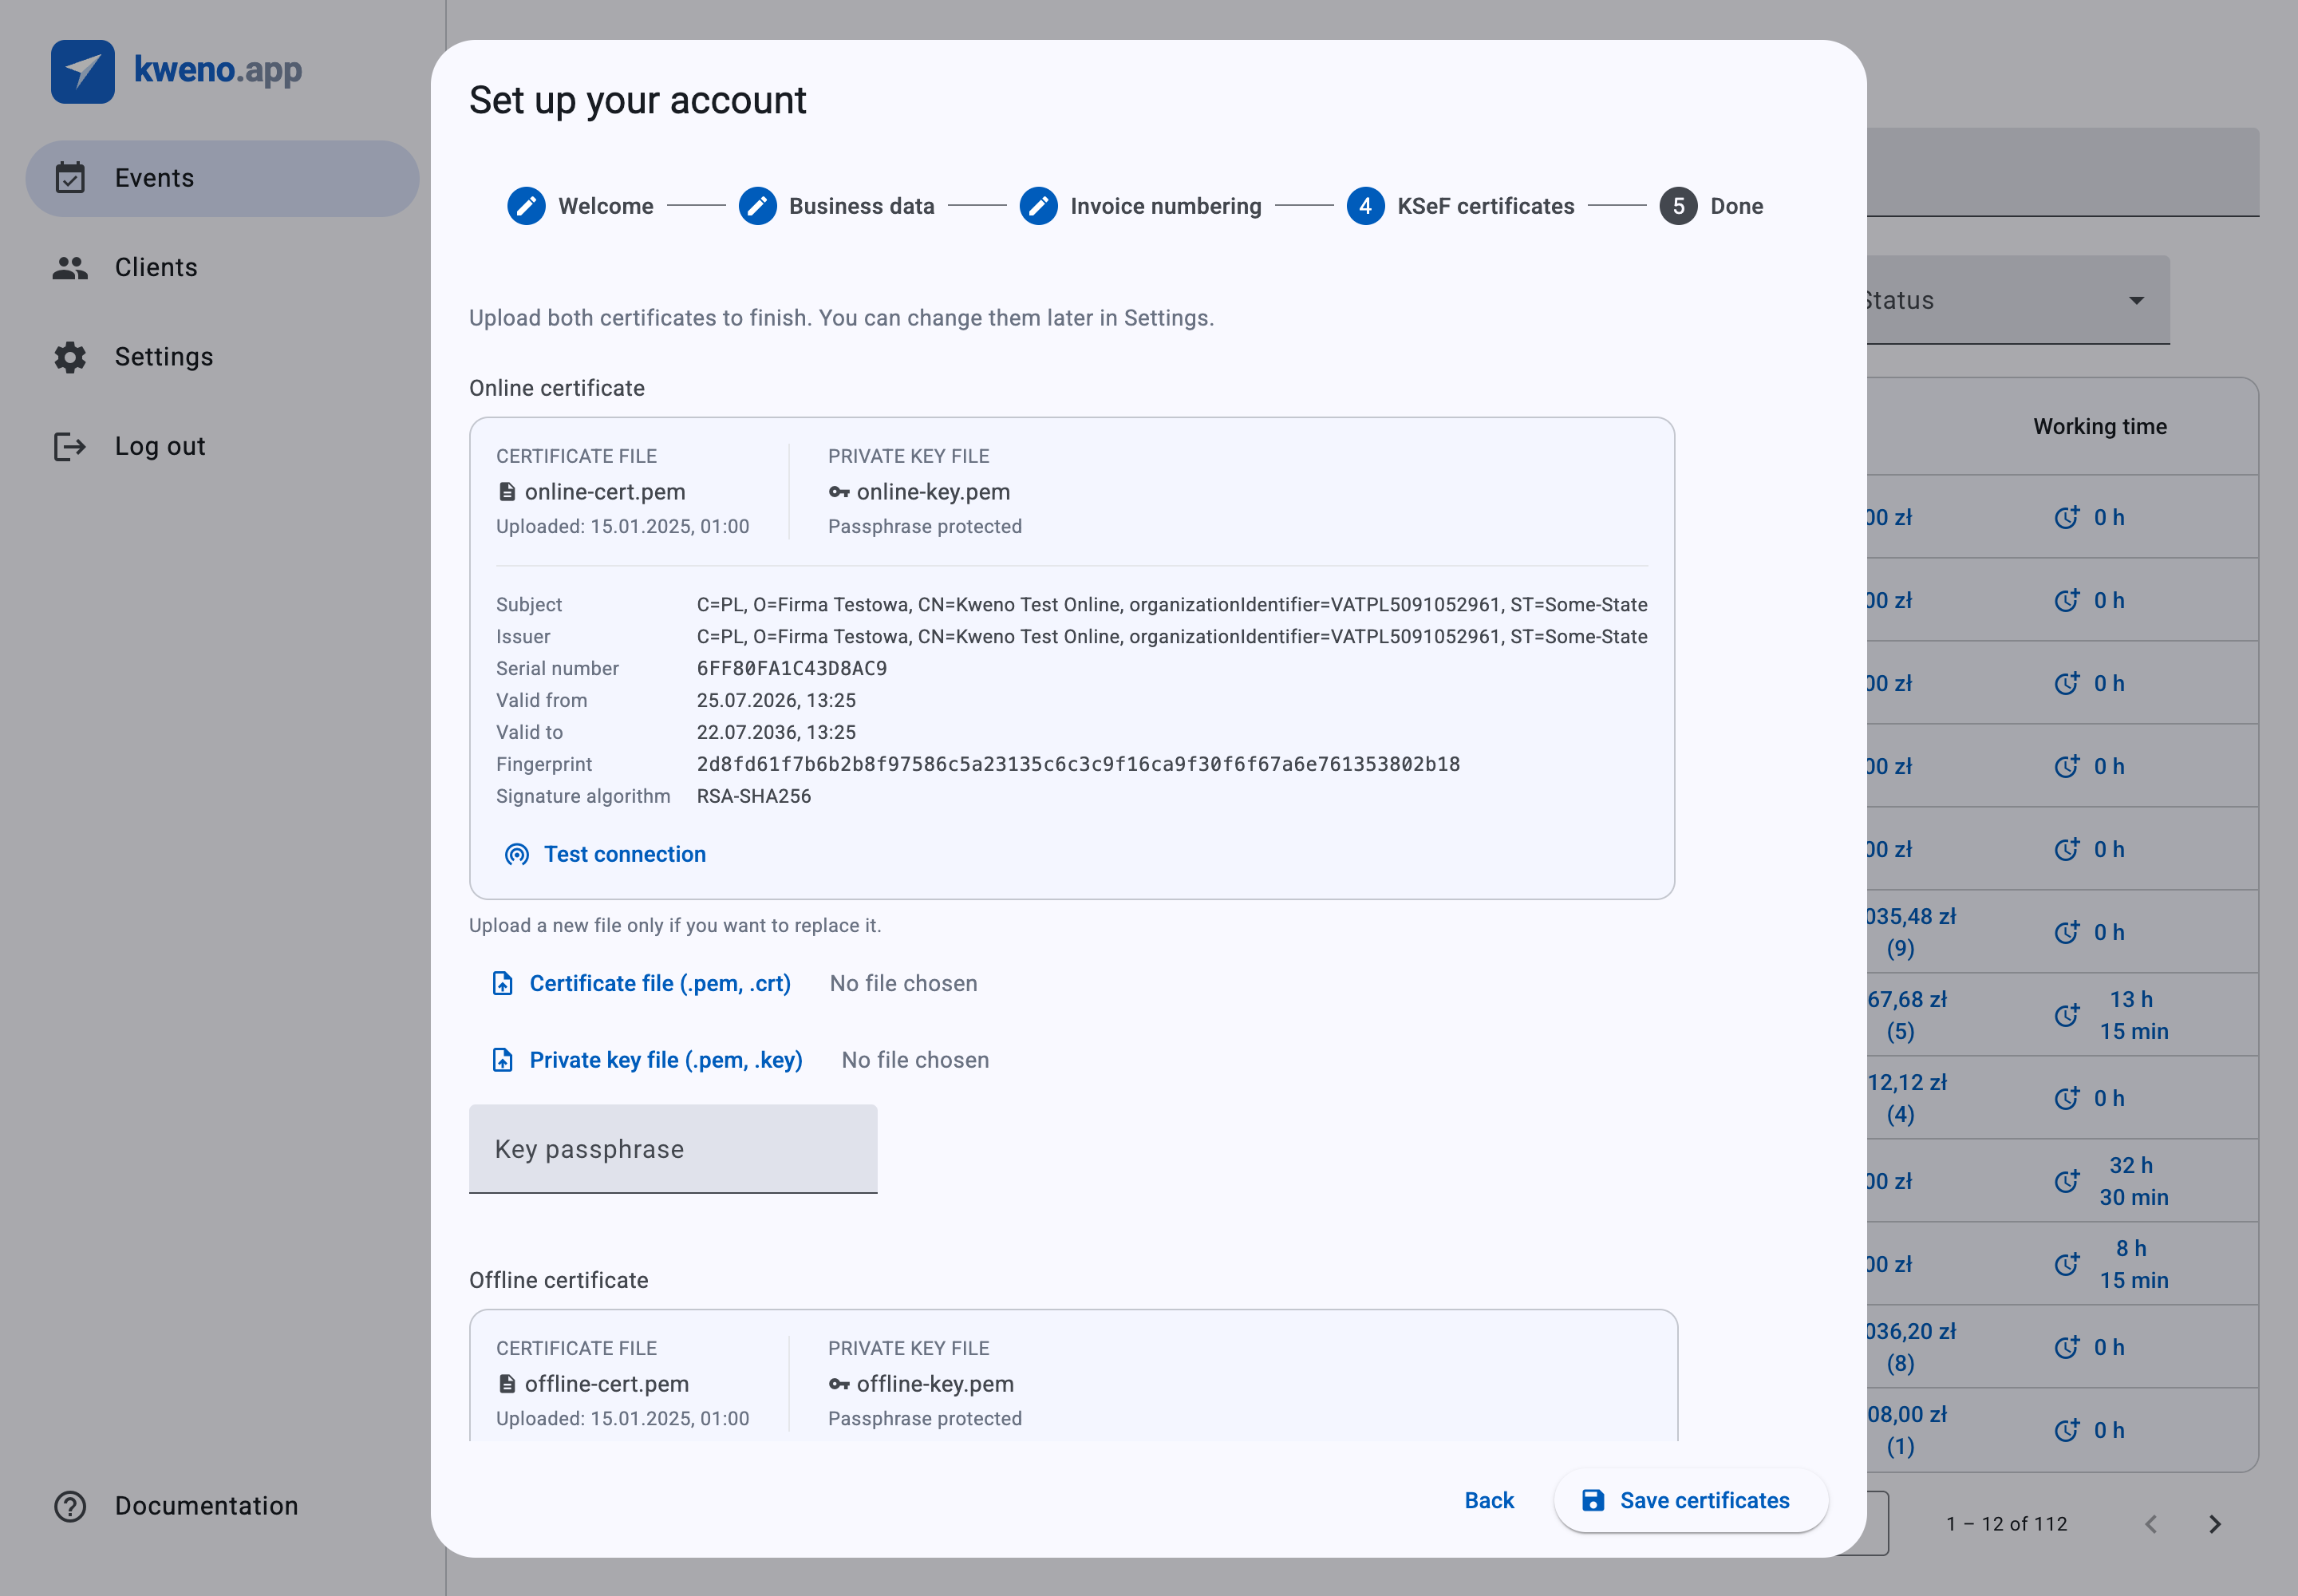
This step is where you upload the certificates kweno.app uses to talk to KSeF. There are two slots on the same step:
- Online certificate
- Offline certificate
A helper line reads: Upload both certificates to finish. You can change them later in Settings. If a certificate is already saved, its details are shown along with the hint Upload a new file only if you want to replace it.
Upload the certificate file and its private key for the online (interactive) certificate. This is the certificate later used to test the KSeF connection.
Upload the certificate file and its private key for the offline certificate.
Both certificates are required to continue
The Save certificates button stays disabled until both the online and the offline certificate are ready. A certificate is "ready" in one of two cases: it is already saved and you have not started replacing it, or you have uploaded a new, valid file (the certificate and its private key, plus the key passphrase if the key is protected). You cannot continue with only one of the two ready.
Once both certificates are ready, click Save certificates to upload them. After a successful save, the button changes to Finish. Clicking Finish marks your account as set up and takes you to the final step.
For everything about certificate files, key passphrases, validation errors, and the connection test, see KSeF certificates.
Done
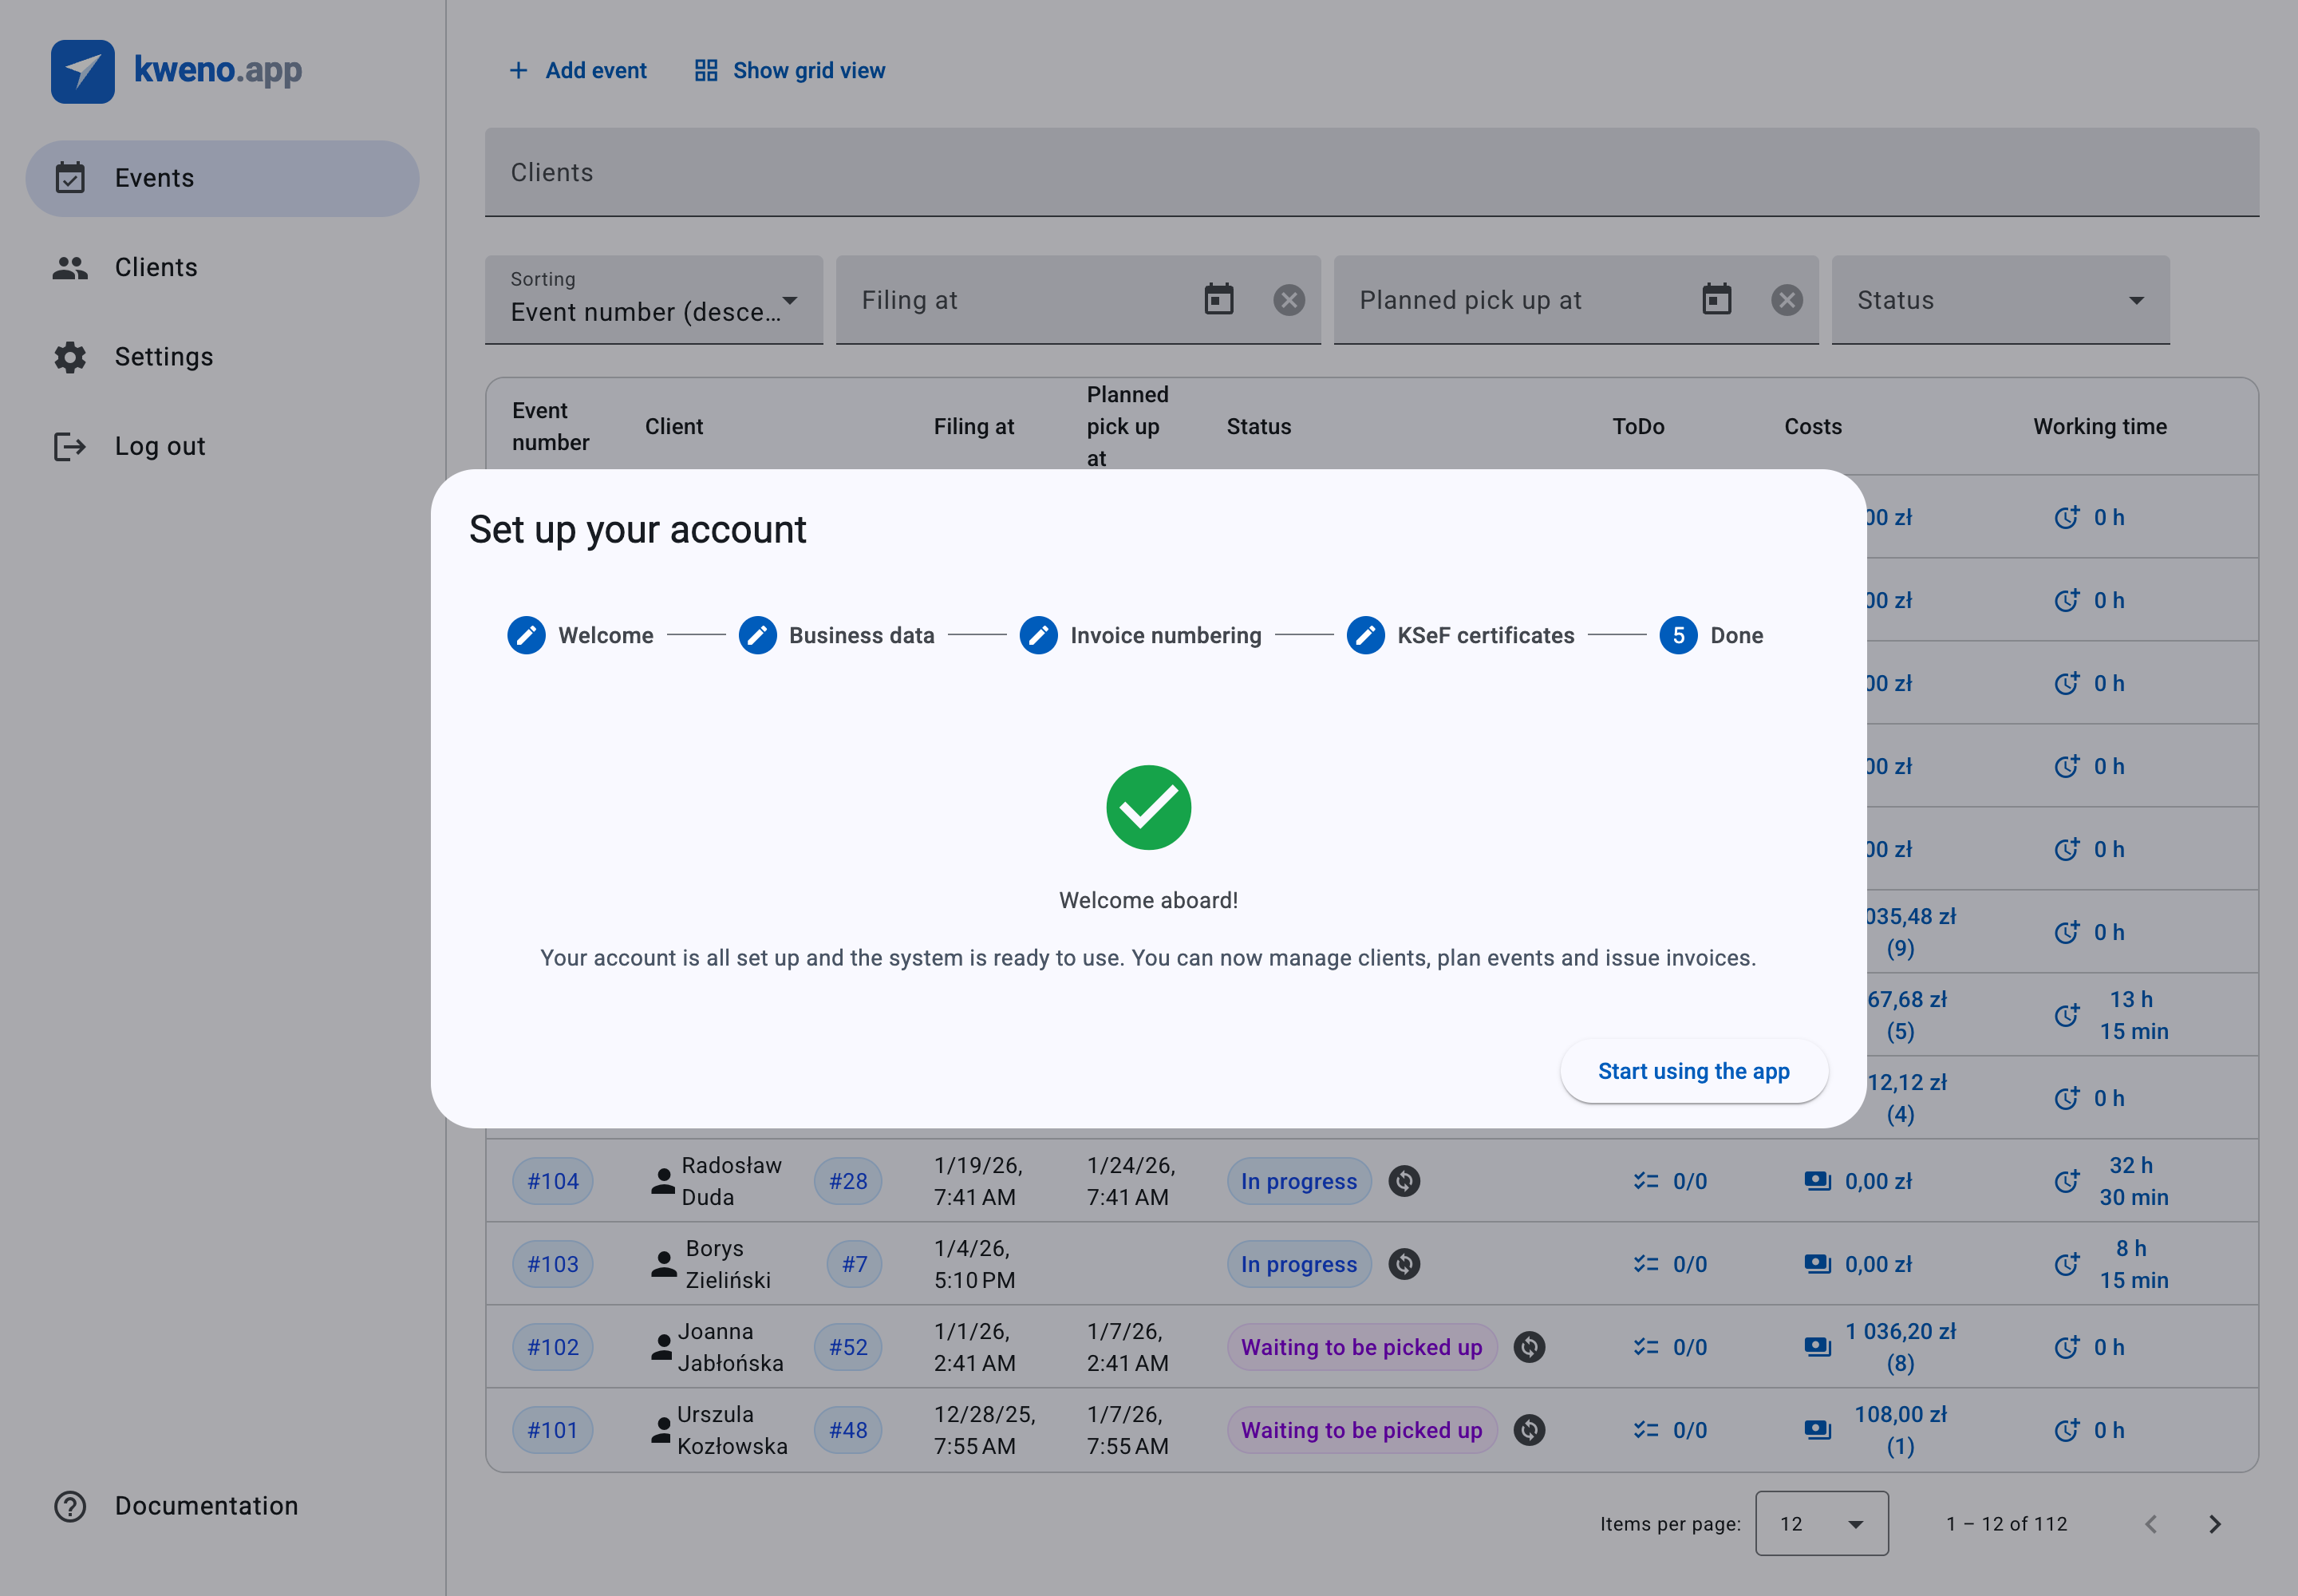
The final step confirms you are ready.
- Heading: Welcome aboard!
- Message: Your account is all set up and the system is ready to use. You can now manage clients, plan events and issue invoices.
Click Start using the app to close the wizard and begin working.
Skip and finish later
Nothing in the wizard is mandatory. You can leave setup at any point and finish it later:
- On the Welcome step, click Skip for now. This closes the wizard right away and marks your account as set up. Nothing is saved — you land in the app with no business data, no invoice settings, and no certificates yet.
- On any later step, use Back to revisit an earlier step. You reach the content steps only by clicking through, so if you want to skip everything, do it from the Welcome step before entering them.
Note
Once you skip (or finish) the wizard, it will not open automatically again. You can complete or change any of these settings whenever you like from Settings — see Business data, Invoicing, KSeF certificates, and Account & preferences.
You are ready
With your business data, invoice numbering, and certificates in place, you can start working. Common next steps:
- Add a client to invoice — see Clients.
- Create an event for the work you do — see Events.
- Issue an invoice and send it to KSeF — see Invoices & KSeF.
Troubleshooting
If you cannot sign in, check the message shown in red above the sign-in card:
Sign-in errors
- Incorrect e-mail address or password. — the e-mail or password does not match an account. Re-check both, mind the caps lock key, and try again. If you are unsure of your password, use Forgot password? to reset it.
- Too many failed login attempts. Please wait a moment and try again. — this appears after 5 failed attempts within a minute. Wait a short while, then try again.