To-dos
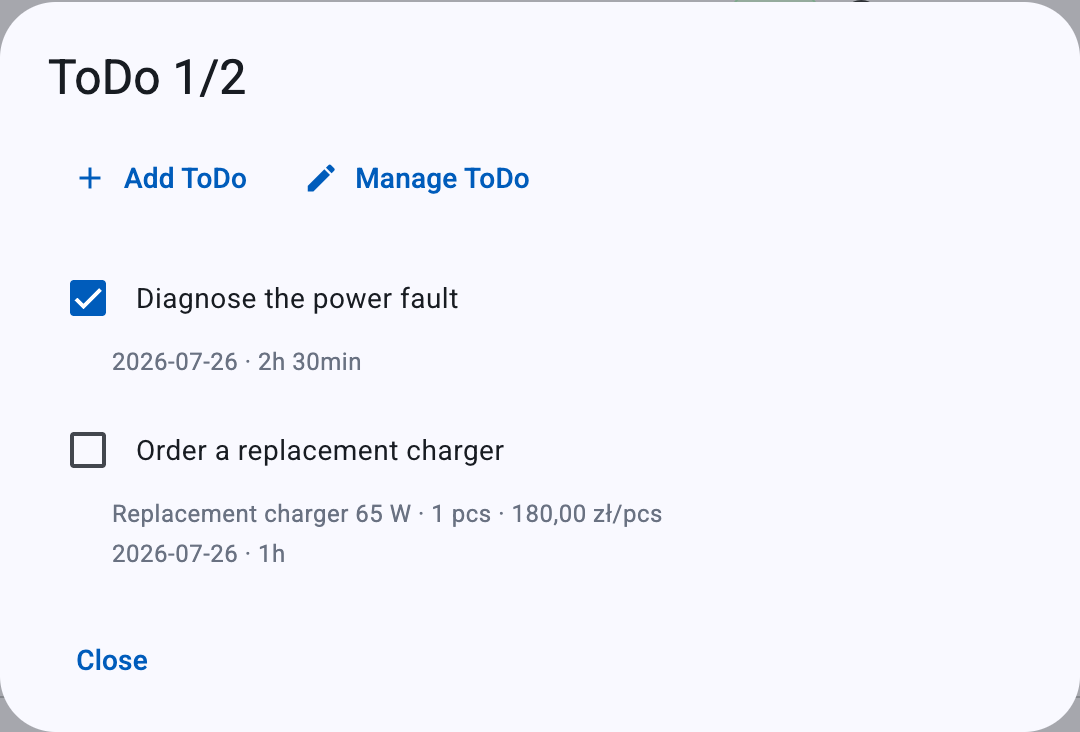
A to-do is a simple checklist note you attach to an event to track what still needs doing on a job. To-dos are internal working notes: they have no price, no quantity and no VAT, and they are never billed. Use them to jot down tasks, remind yourself of open steps, and tick them off as the work progresses.
In the app the button and dialog are labelled ToDo. In these instructions "to-do" refers to the same thing.
Note
A to-do is optional. An event works perfectly well without any to-dos. They exist purely to help you organise the work — nothing about a to-do affects an invoice.
How to-dos fit into an event
Every event can hold a list of to-dos. Each one is either completed or not, and the app keeps a running count of how many are done out of the total (for example 2/5). You can:
- Add to-dos while you create the event, or at any time afterwards.
- Tick a to-do to mark it complete, and untick it to reopen it.
- Edit the text of a to-do, or delete it.
- Link a cost or a working time entry to a to-do, so that item is grouped under it.
Where the count comes from
On the events list, each event shows a ToDo badge in the form completed/total. It updates immediately whenever you tick, add or delete a to-do.
Add a to-do
You can create to-dos in two places.
While creating a new event
When you add a brand-new event, the create dialog includes a to-do section (this section appears only while adding a new event, not when editing an existing one):
- The section starts with one empty to-do field, labelled ToDo #1.
- Type the task text into the field.
- To add another row, click Next ToDo, or press Enter inside a to-do field — a new row (ToDo #2, ToDo #3, and so on) appears and is focused.
- To remove a row before saving, click the trash icon next to it.
- Finish and save the event with Add event.
Empty to-do rows are ignored when you save, so you can leave spare rows blank. Each to-do can be up to 512 characters.
Note
To-dos cannot be edited from the Editing existing event dialog. On an event that already exists, manage its to-dos from the separate ToDo option described below.
On an existing event
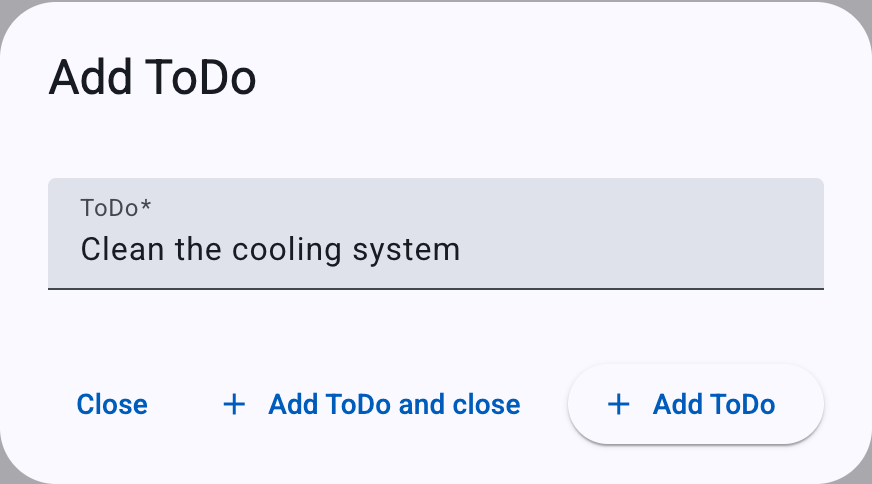
- Open the event's ToDo view. You can reach it from the ToDo badge on the event in the list, or from the event's options menu (Show options → ToDo).
- Click Add ToDo at the top of the dialog. The Add ToDo dialog opens.
- In the single ToDo field, type the task text.
- Save with one of the buttons below.
The ToDo field
| Field | What it is | Notes |
|---|---|---|
| ToDo | The task text of the checklist item. | Required. Up to 512 characters. Leading and trailing spaces are trimmed before saving. This is the only field — a to-do has no price, quantity, unit or VAT. |
If you try to save with the field empty, the app will not accept it — enter some text first.
Buttons in the Add ToDo dialog
- Add ToDo — saves the to-do and clears the field so you can immediately add another, keeping the dialog open. Use this to enter several to-dos in a row.
- Add ToDo and close — saves the to-do and closes the dialog.
- Close — closes the dialog without adding anything further (to-dos you already saved with Add ToDo stay saved).
Tip
After you add the very first to-do to an event that had none, a Go to ToDo list shortcut appears in the dialog, letting you jump straight to the full to-do list.
Manage to-dos
Open the event's ToDo view to see everything at once. The dialog title reads ToDo followed by the completed/total count, for example ToDo 2/5.
Show mode (default)
Each to-do is shown as a checkbox row:
- Tick the checkbox to mark the to-do complete. The completion time is recorded and the completed count updates immediately.
- Untick the checkbox to reopen it.
If any costs or working time entries are linked to a to-do, they appear as grey sub-lines beneath it:
- A linked cost shows its name, quantity with unit, and purchase price per unit — for example
Brake pads · 2 pcs · 45,00 zł/pcs. - A linked working time entry shows its date and duration — for example
2026-07-21 · 1h 30min.
Manage mode (edit and delete)
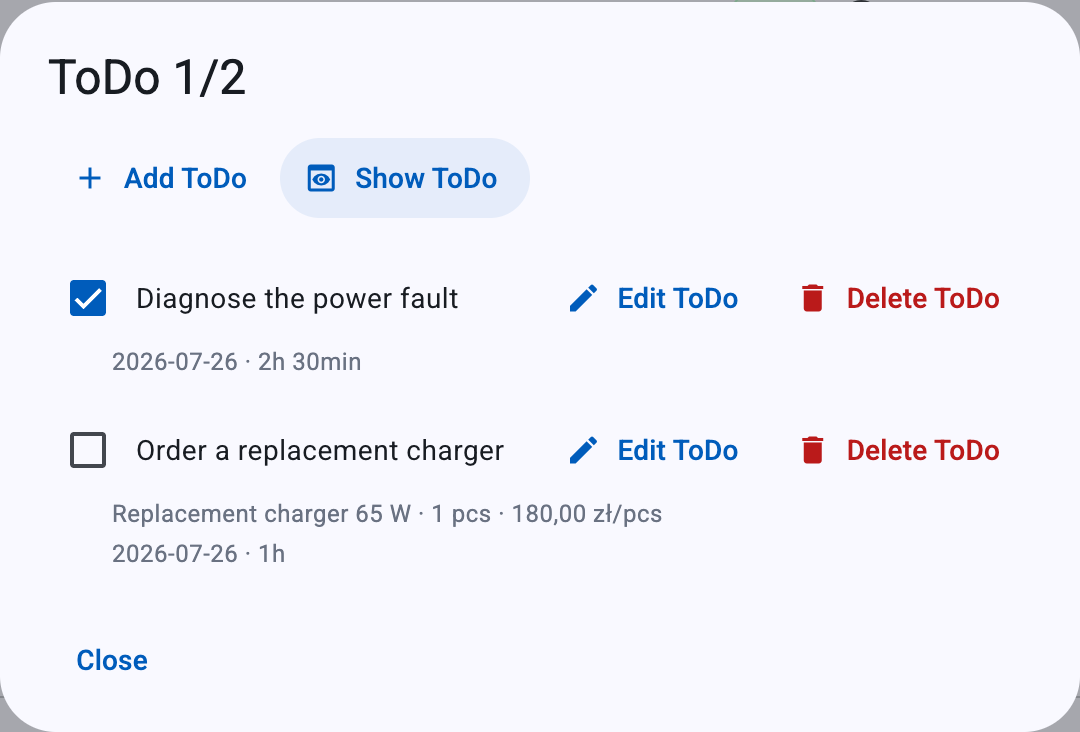
To change or remove to-dos, switch the dialog into manage mode:
- Click Manage ToDo at the top of the dialog. Each row now also shows Edit ToDo and Delete ToDo buttons.
- To change the text, click Edit ToDo. The Edit ToDo dialog opens with the current text in the ToDo field. Adjust it and click Save ToDo.
- To remove a to-do, click Delete ToDo.
- Click Show ToDo to switch back to the plain checklist view. (Show ToDo is disabled when there are no to-dos.)
Deleting is immediate
Clicking Delete ToDo removes the to-do straight away — there is no confirmation step. Delete only when you are sure.
Click Close to close the dialog. Anything you ticked, added, edited or deleted has already been saved.
Linking costs and working time to a to-do
A to-do carries no value itself, but you can group billable items under it. When you add or edit a cost or a working time entry, and the event has at least one to-do, those dialogs show a ToDo (optional) selector:
- Choose None to leave the item unlinked.
- Choose a to-do to attach the item to it.
Linked items then appear as grey sub-lines under their to-do in the ToDo view (see above), which makes it easy to see what work and materials belong to each task.
Note
Linking is only about organisation. It does not change the price, VAT or billing of the cost or working time entry — the to-do stays unbilled either way.
Where to-dos appear
- On the event's ToDo view — the full checklist, with completed/total count and any linked costs and working time.
- On the events list — the ToDo badge on each event shows
completed/total. Clicking it opens the ToDo view. - In the event preview — the read-only preview includes a ToDo panel listing the to-dos (expanded when there are any).
- On the service intake form — the to-dos that exist when the event is created are captured on the event's service intake form (the PDF generated at creation), alongside the client, filing details and description.
Info
The service intake form is a snapshot taken at the moment the event is created. To-dos you add, edit, tick or delete afterwards are reflected in the app, but not in a service intake form that was already generated.
Related
- Events — create and manage the event that holds your to-dos.
- Costs — record materials and parts, and link them to a to-do.
- Working time — log time spent, and link it to a to-do.