KSeF certificates
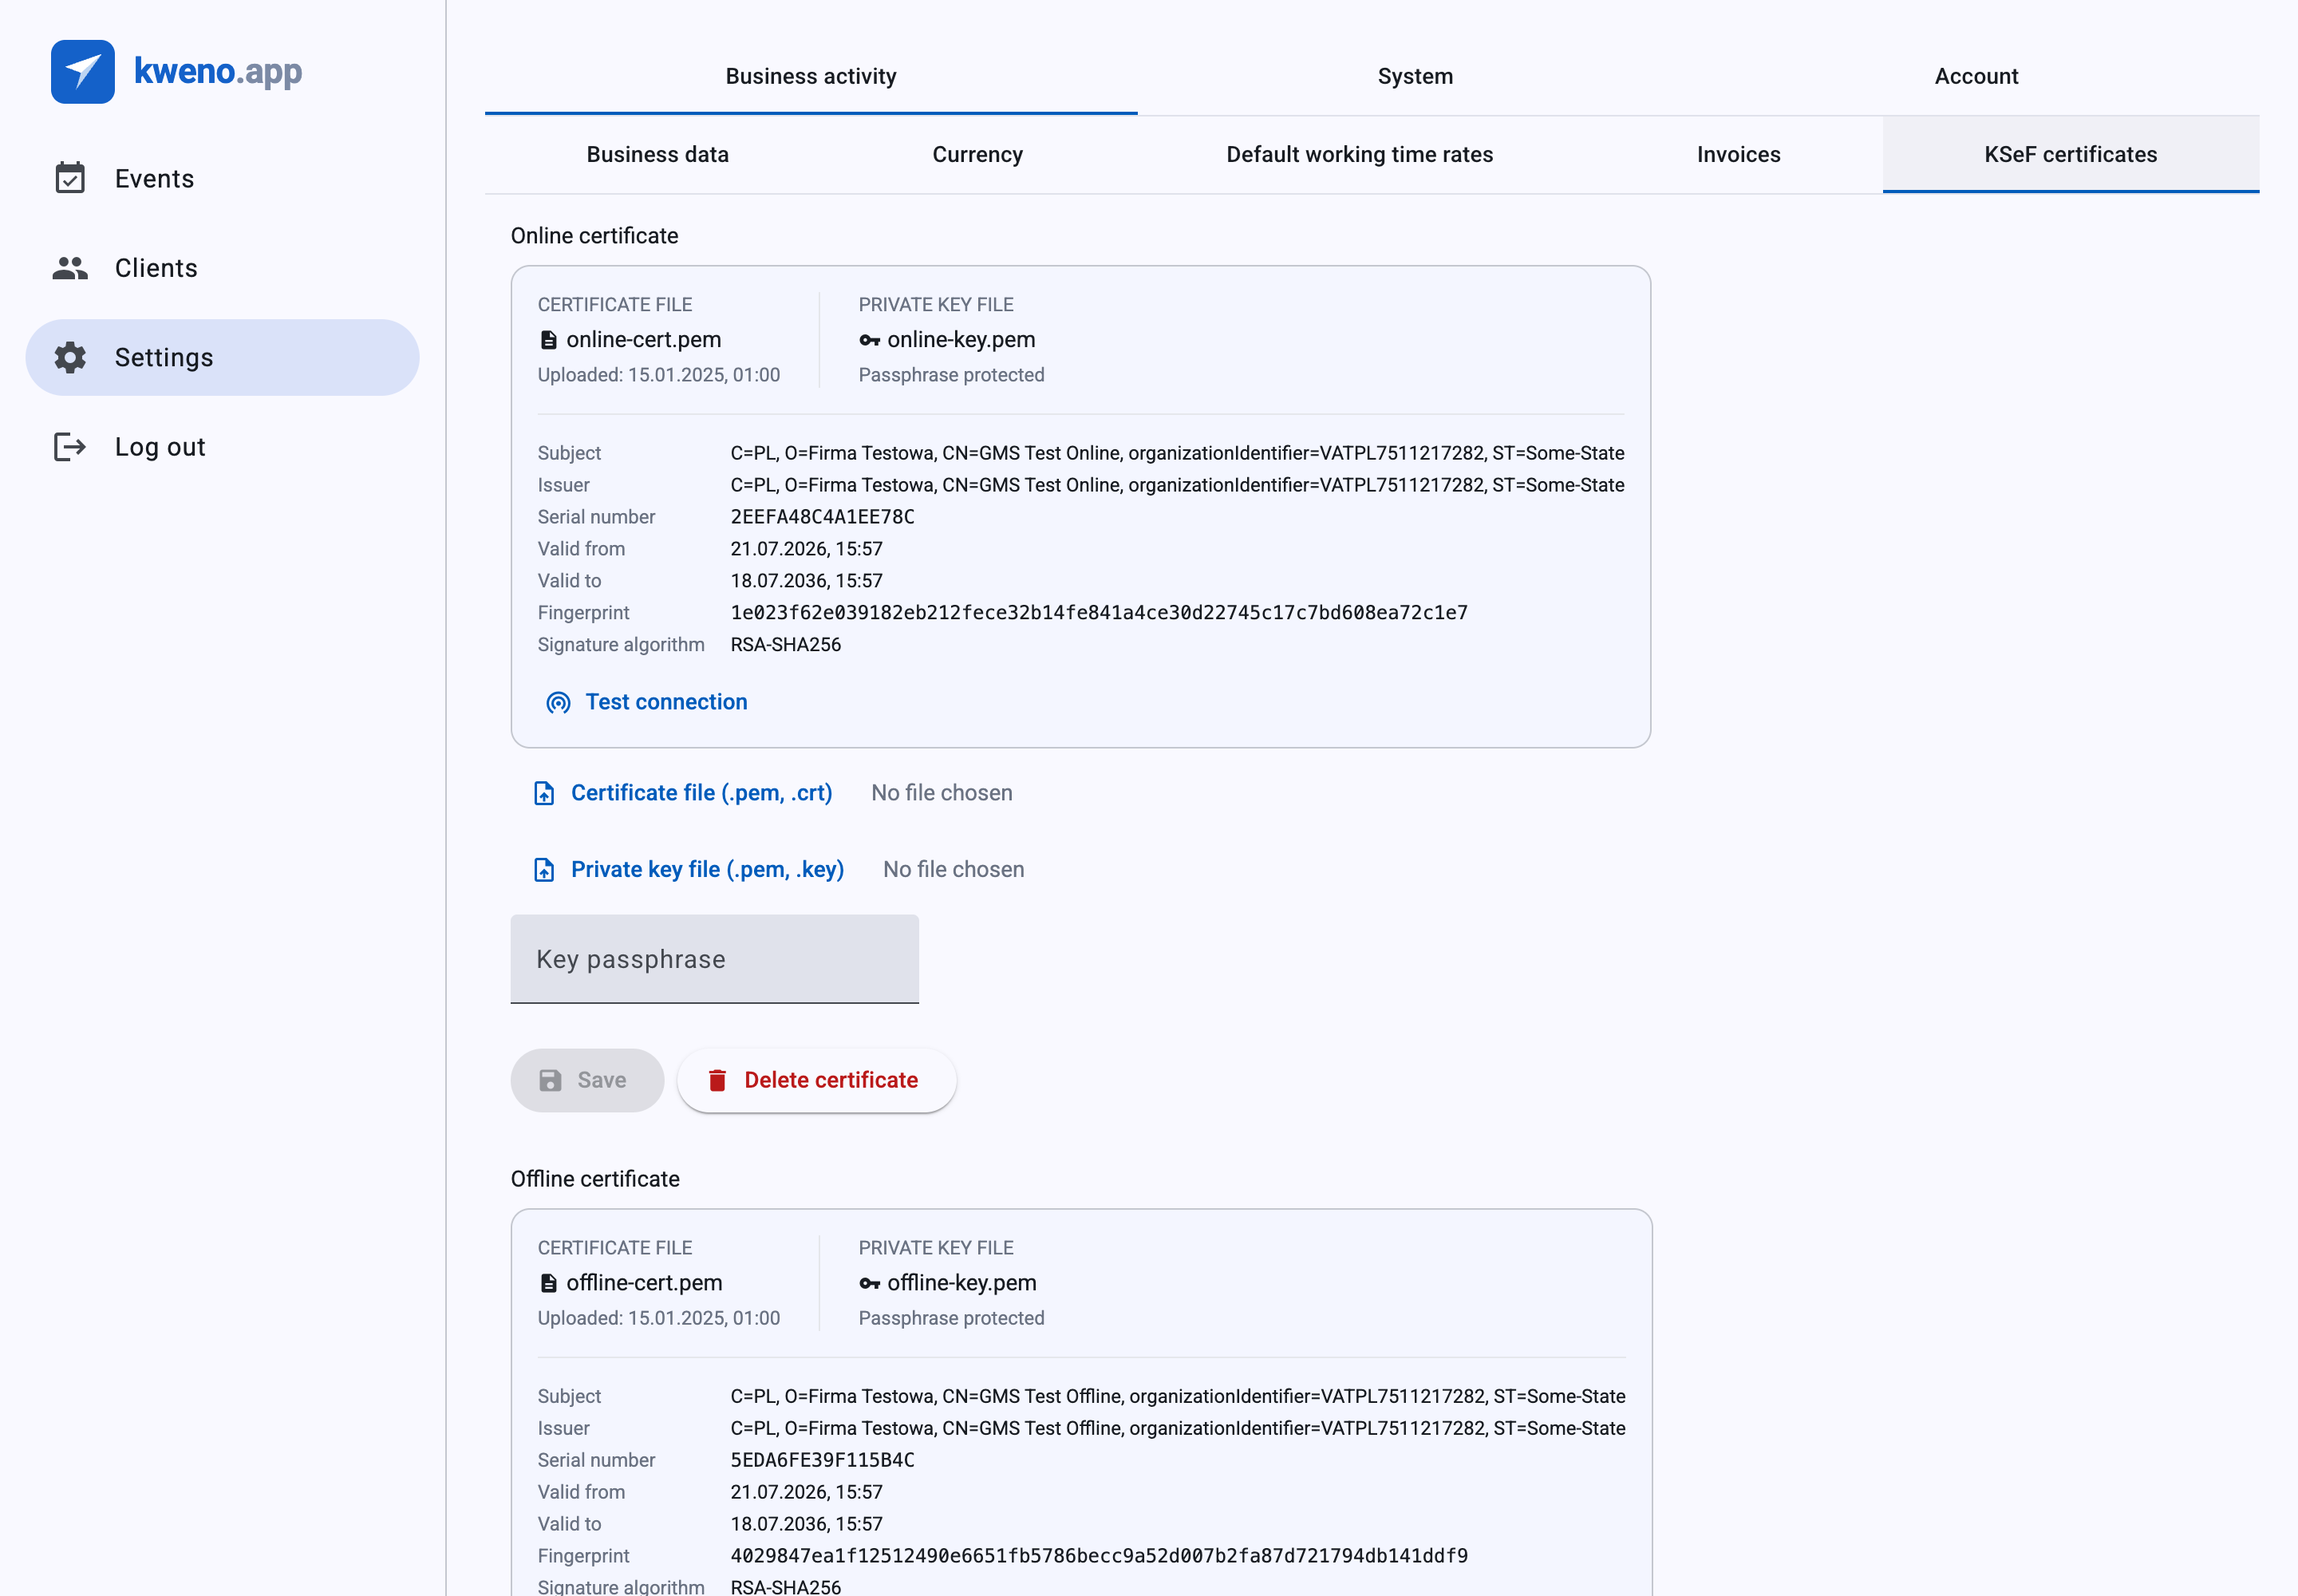
The KSeF certificates settings are where you upload the certificates kweno.app uses to authenticate to KSeF and to sign your invoices. Without a saved online certificate, kweno.app cannot issue or send invoices to KSeF, so set these up before you start invoicing.
You reach this screen from Settings, in the Business activity area, on the KSeF certificates sub-tab. You can also upload the same certificates during the wizard covered in Onboarding — the fields are identical, only the save button differs (see below).
Info
KSeF is Poland's National e-Invoicing System. kweno.app submits your invoices to KSeF in the FA(3) format. A certificate is how KSeF confirms that the invoices really come from you. See Invoices & KSeF for the full invoicing flow and KSeF statuses for what happens after an invoice is sent.
Before you start
The connection test and invoice issuing both depend on other settings being in place first:
- Business data with a TIN must be saved. Set this up on the Business data sub-tab.
- An online certificate must be uploaded and saved on this screen.
If either is missing, the connection test and invoice issuing will fail.
Online vs offline certificate
This screen has two independent certificate slots, each with its own upload form, details card and buttons. You need both for full KSeF operation. kweno.app keeps them separate so you can replace or delete one without touching the other.
The Online certificate is the one kweno.app uses to authenticate to KSeF in real time — establishing the connection and submitting your invoices. It is the certificate the Test connection action checks, and it is the one required to issue and send invoices. If this slot is empty, issuing an invoice fails.
The Offline certificate is the second certificate kweno.app stores for KSeF operation. Upload it here the same way you upload the online certificate. The onboarding wizard asks you to supply both an online and an offline certificate to finish setup.
Note
Only the Online certificate slot has a Test connection action. The Offline certificate slot has the same upload form, details card and delete option, but no connection test.
Upload a certificate
Each slot has the same upload form. Repeat these steps once for the Online certificate and once for the Offline certificate.
- Click the Certificate file (.pem, .crt) button and choose your certificate file. Before you pick a file the button shows No file chosen; after you pick one, the filename appears next to the button.
- Click the Private key file (.pem, .key) button and choose the matching private key file. It shows No file chosen until you select one.
- If your private key is encrypted, type its passphrase into the Key passphrase field. Leave this empty if the key is not encrypted.
- Click Save.
On a successful save the form resets and the certificate details card appears above it.
Field reference
| Field | What it is | Notes |
|---|---|---|
| Certificate file (.pem, .crt) | Your X.509 certificate. | Required. Accepts .pem, .crt and .cer files. |
| Private key file (.pem, .key) | The private key that matches the certificate. | Required. Accepts .pem and .key files. |
| Key passphrase | The passphrase that unlocks an encrypted private key. | Optional. Leave empty if the key is not encrypted. |
Note
On the KSeF certificates settings sub-tab the save button is labelled Save. In the onboarding wizard the equivalent button is labelled Save certificates, because the wizard saves both the online and offline certificate together. Both do the same job.
Tip
The Save button stays disabled while the form is invalid, while a save is in progress, or while the screen is still loading your existing data. If it will not activate, check that you have chosen both a certificate file and a private key file.
Test the connection
Use the Test connection action in the Online certificate slot to confirm that kweno.app can authenticate to KSeF with the certificate you saved.
- Make sure your Business data with a TIN is saved and that you have saved an online certificate.
- Click Test connection.
- Read the result:
- Success shows a green line: "Connection successful".
- A failure shows one or more red lines, each with a message and a short code in brackets.
If the test cannot be run in the usual way, kweno.app shows a general fallback message: "Connection test failed."
The specific failure messages you may see are:
| Message | What it means |
|---|---|
| "No online certificate configured." | No online certificate has been saved yet. Upload and save one first. |
| "Business data with TIN is required to test the connection." | Your business data, including a TIN, is not saved. Fill it in on the Business data sub-tab. |
| A KSeF authentication message | KSeF rejected the authentication. The exact text comes from KSeF. |
| "Unexpected error while connecting to KSeF." | Something went wrong while reaching KSeF. Try again. |
Warning
A successful test needs both an online certificate saved and business data with a valid TIN saved. If either is missing, the test cannot succeed.
Certificate details
Once a certificate is saved, a details card appears above the upload form for that slot. It has two file summaries followed by a grid of values kweno.app reads from the certificate itself.
File summaries
- Certificate file — the stored certificate filename, with Uploaded and the date and time it was saved.
- Private key file — the stored key filename, and either Passphrase protected if you saved a passphrase, or No passphrase if you did not.
Certificate values
| Field | What it shows |
|---|---|
| Subject | Who the certificate was issued to. |
| Issuer | Who issued the certificate. |
| Serial number | The certificate's serial number. |
| Valid from | The date and time the certificate becomes valid. |
| Valid to | The date and time the certificate expires. |
| Fingerprint | The certificate's fingerprint. |
| Signature algorithm | The algorithm used to sign the certificate. |
Tip
Check Valid to from time to time. An expired certificate cannot authenticate to KSeF, so replace it before the date shown to avoid a break in invoicing.
Replace or delete
- Replace — to swap a certificate, simply upload a new certificate file and private key file in the same slot and click Save. The new files take the place of the old ones, and the details card refreshes.
- Delete — click Delete certificate to remove the certificate from that slot. This button is only enabled when that slot has a saved certificate.
Warning
Deleting your online certificate stops kweno.app from issuing and sending invoices to KSeF until you upload a new one. Only delete a certificate when you intend to replace it or you no longer need to send invoices.
Troubleshooting
"Certificate does not match the private key"
When you click Save, the Private key file (.pem, .key) button turns red and shows this message. The certificate file and the private key file you chose do not belong together. Make sure both files come from the same certificate pair, then choose them again and save.
"Passphrase does not decrypt the private key"
When you click Save, the Key passphrase field shows this message. The passphrase you entered does not unlock the private key. Check the passphrase (mind the capitalisation) and try again, or leave the field empty if the key is not actually encrypted.
Related
- Business data — required, with a TIN, before the connection test can succeed.
- Invoices & KSeF — how invoices are issued and sent once your certificates are in place.
- Onboarding — upload the same certificates during first-time setup.
- KSeF statuses — what each KSeF status means after an invoice is sent.